
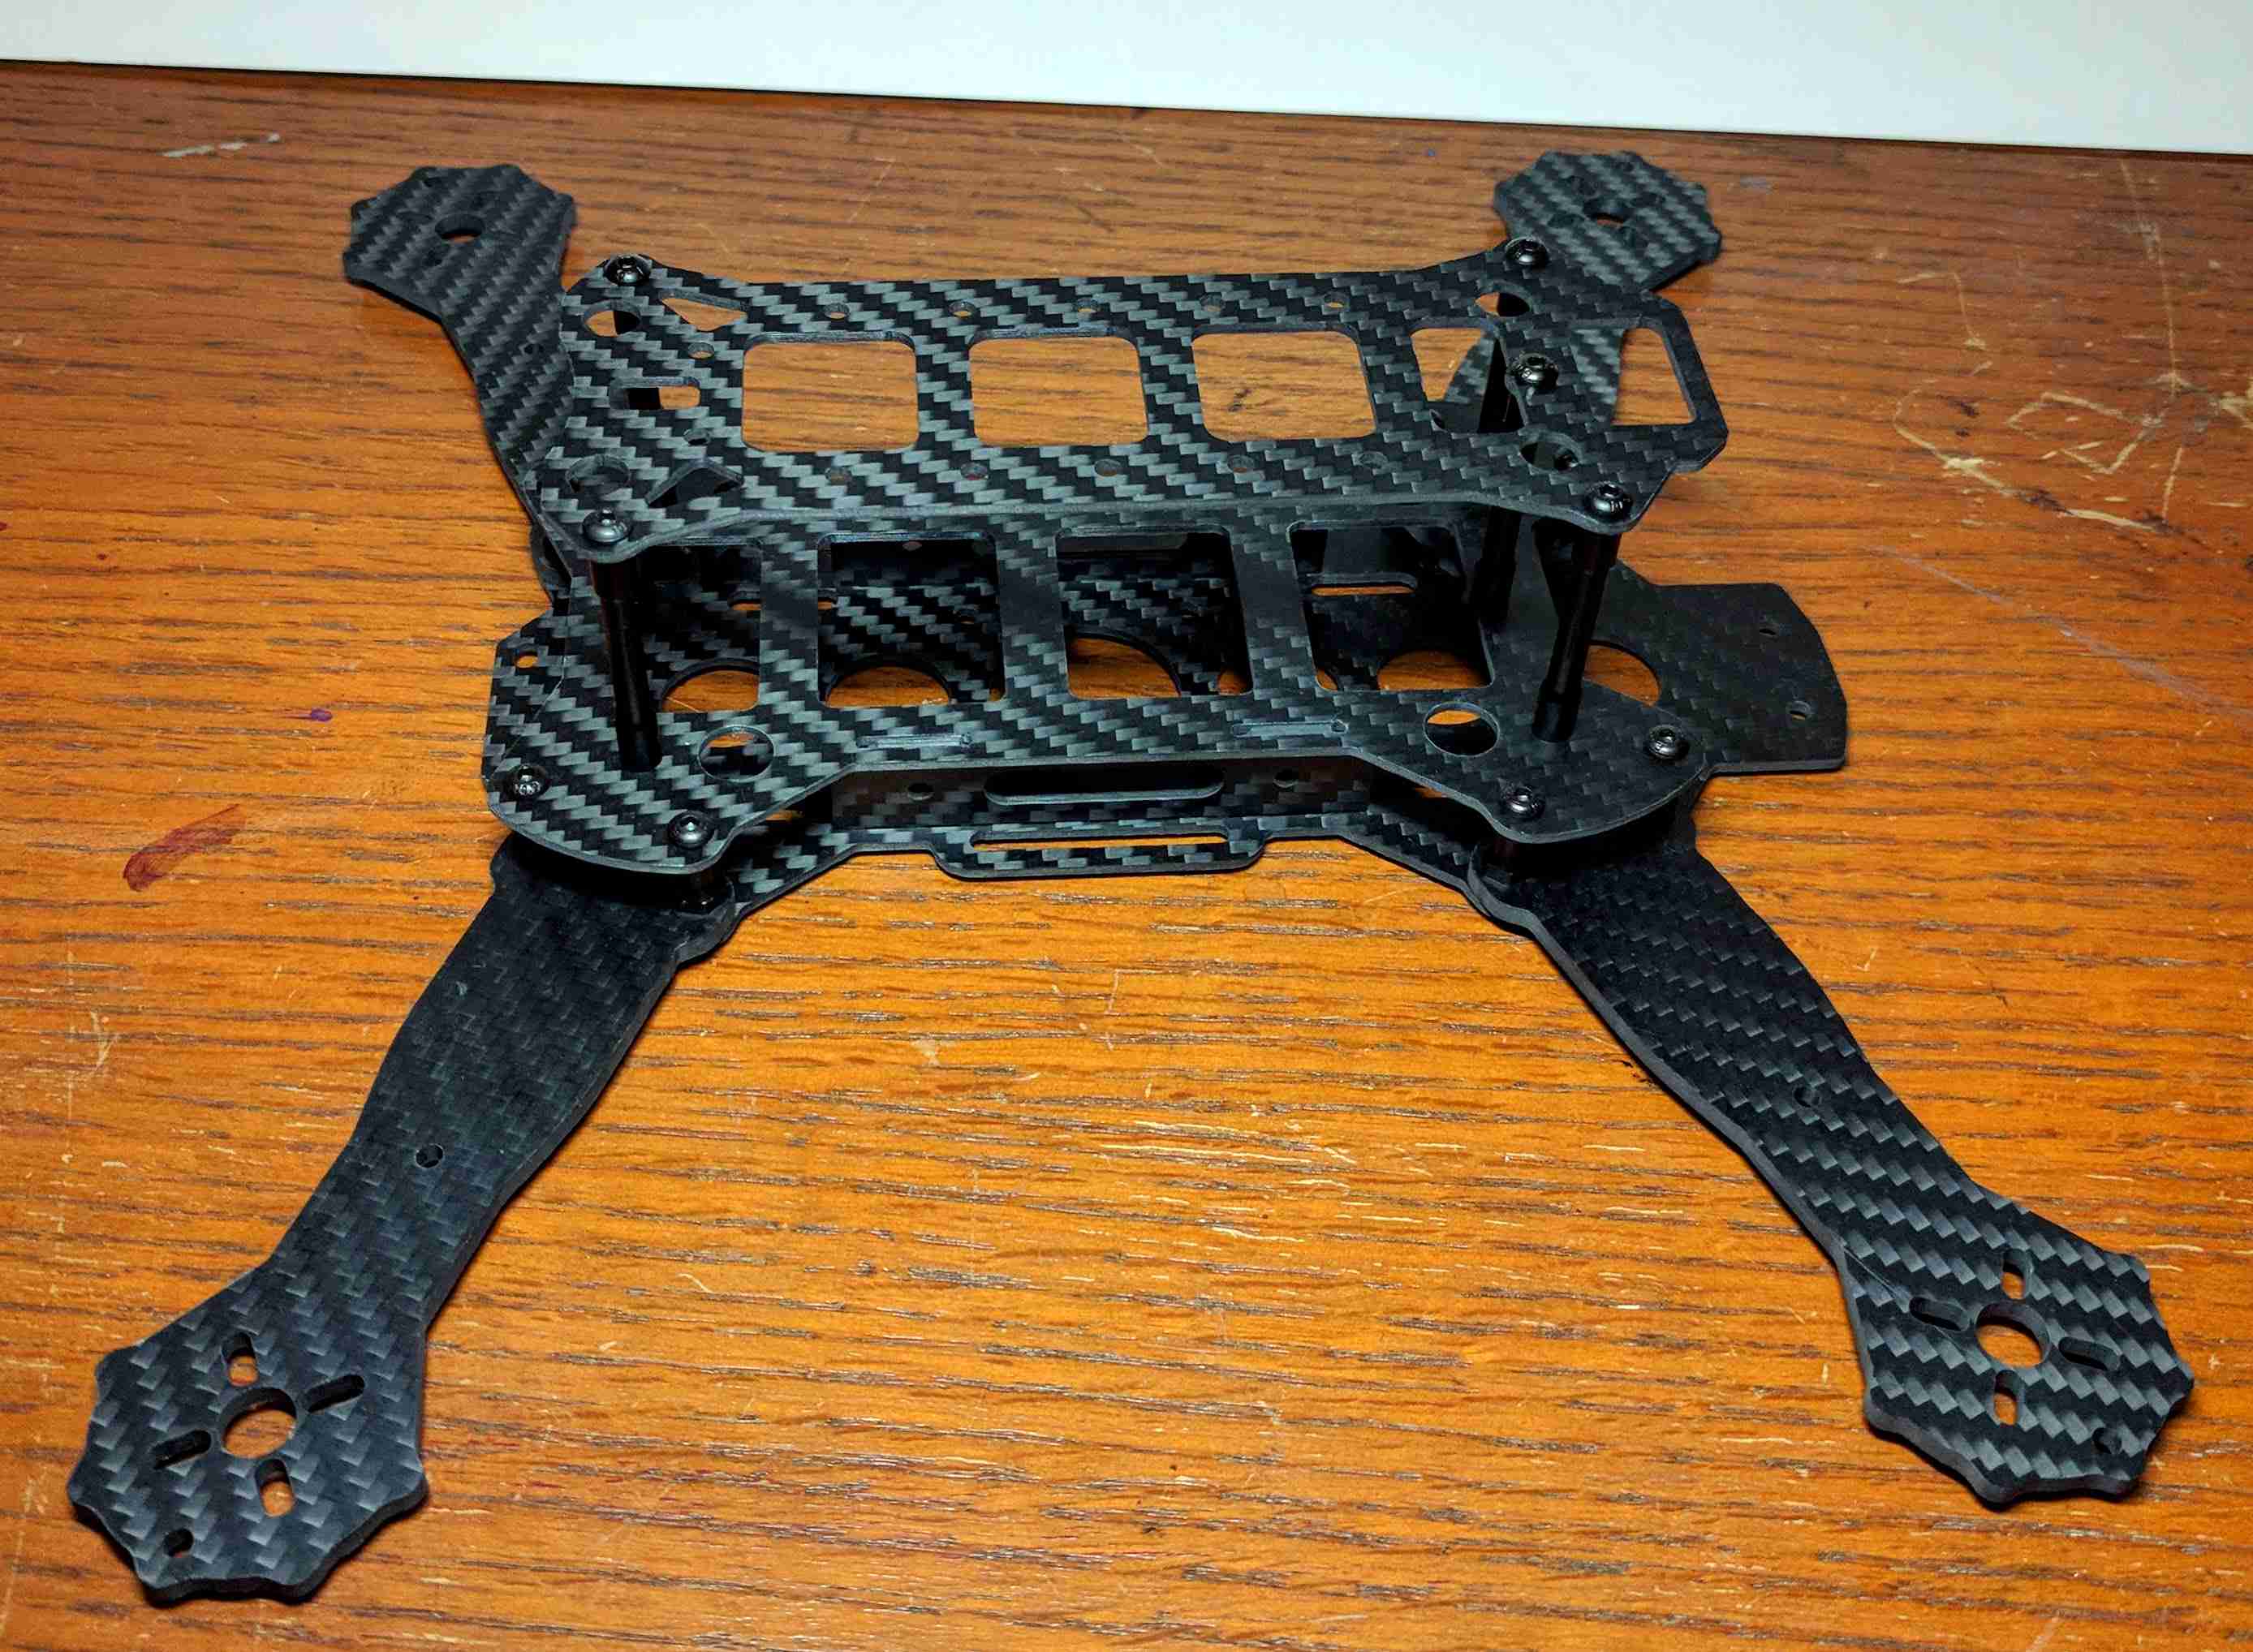
Building the frame seemed like the logical thing to do first. It will provide a base to attach the motors to, which will allow for testing. I have read that you shouldn’t run the motors without any load attached, and I don’t have anything else to hold the motors to with propellers attached.
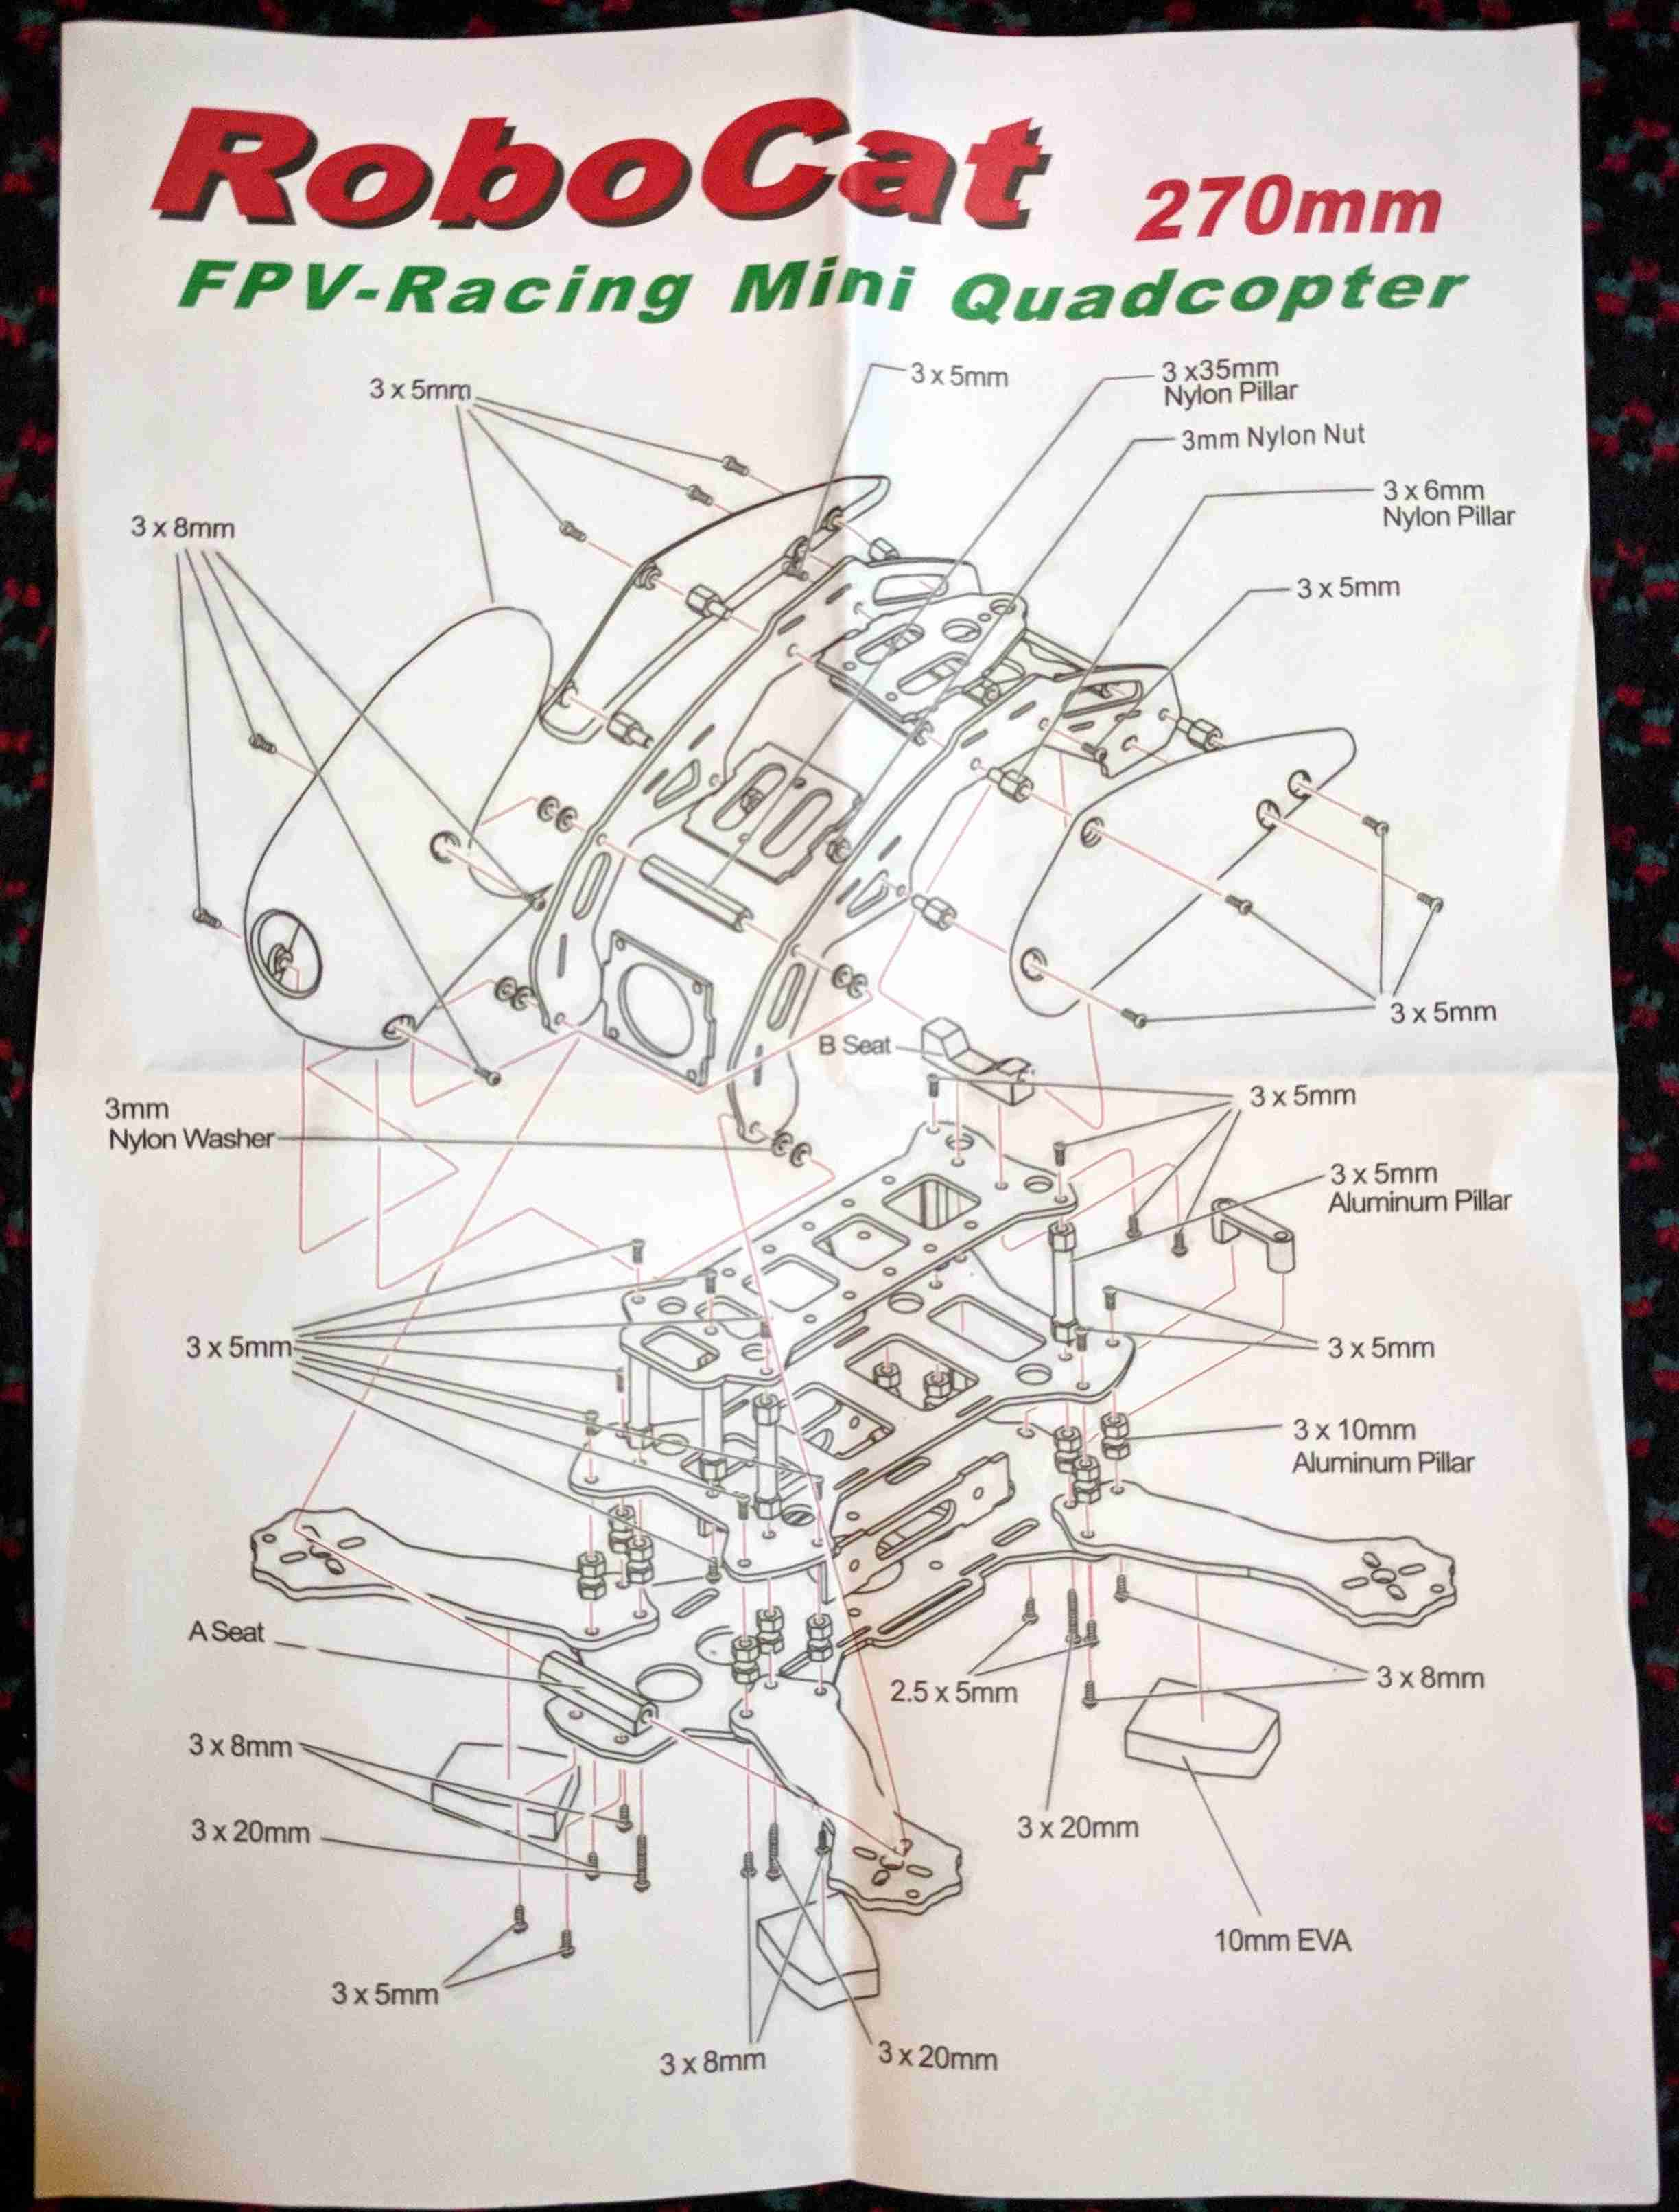
The instructions that came with the kit are just about sufficient to understand what to do. There are lots of parts and I was initially a bit unsure of how to proceed, however, I started at the bottom and built up. It was quite straightforward in the end and required only a small Allen key. There is a sort of canopy that goes on the top which I decided not to put on just yet as it would make it harder to access the internals and it would also add unnecessary weight.
There were a number of factors that went into choosing this frame, and I’m still a little unsure about it. From looking around, the 250mm size (measured approximately from the centre of diagonally opposite motors) is fairly popular with racing drones, so I assume that it is some sort of size category. The frame I got is 270mm which I hope will allow me to build something slightly more powerful (e.g. with larger motors and propellers) to account for the extra weight of a Raspberry Pi and Sense HAT over a standard flight controller.